Showing posts with label water decals. Show all posts

Saturday, March 22, 2014

Soccer Mani With Decals

Hi Monkeys, it is soccer season here for MLS. My favorite team is also sporting a new shield. I'm no stranger when it comes to doing soccer manis.. I've done a few HERE and HERE.

For this mani I've used a base from the new Muppets Most Wanted collection by OPI: Miss Piggy's Big Number. MPBN is a deep blue with a hint of purple duochrome shimmer to it. I used two coats. On my accent finger I did two coats of OPI Alpine Snow then applied a waterslide decal I made with the team's shield. Simple mani yet cute, and best of all shows team support :) Go Quakes!

Wednesday, February 5, 2014

Soccer Gel Mani & Water Decals

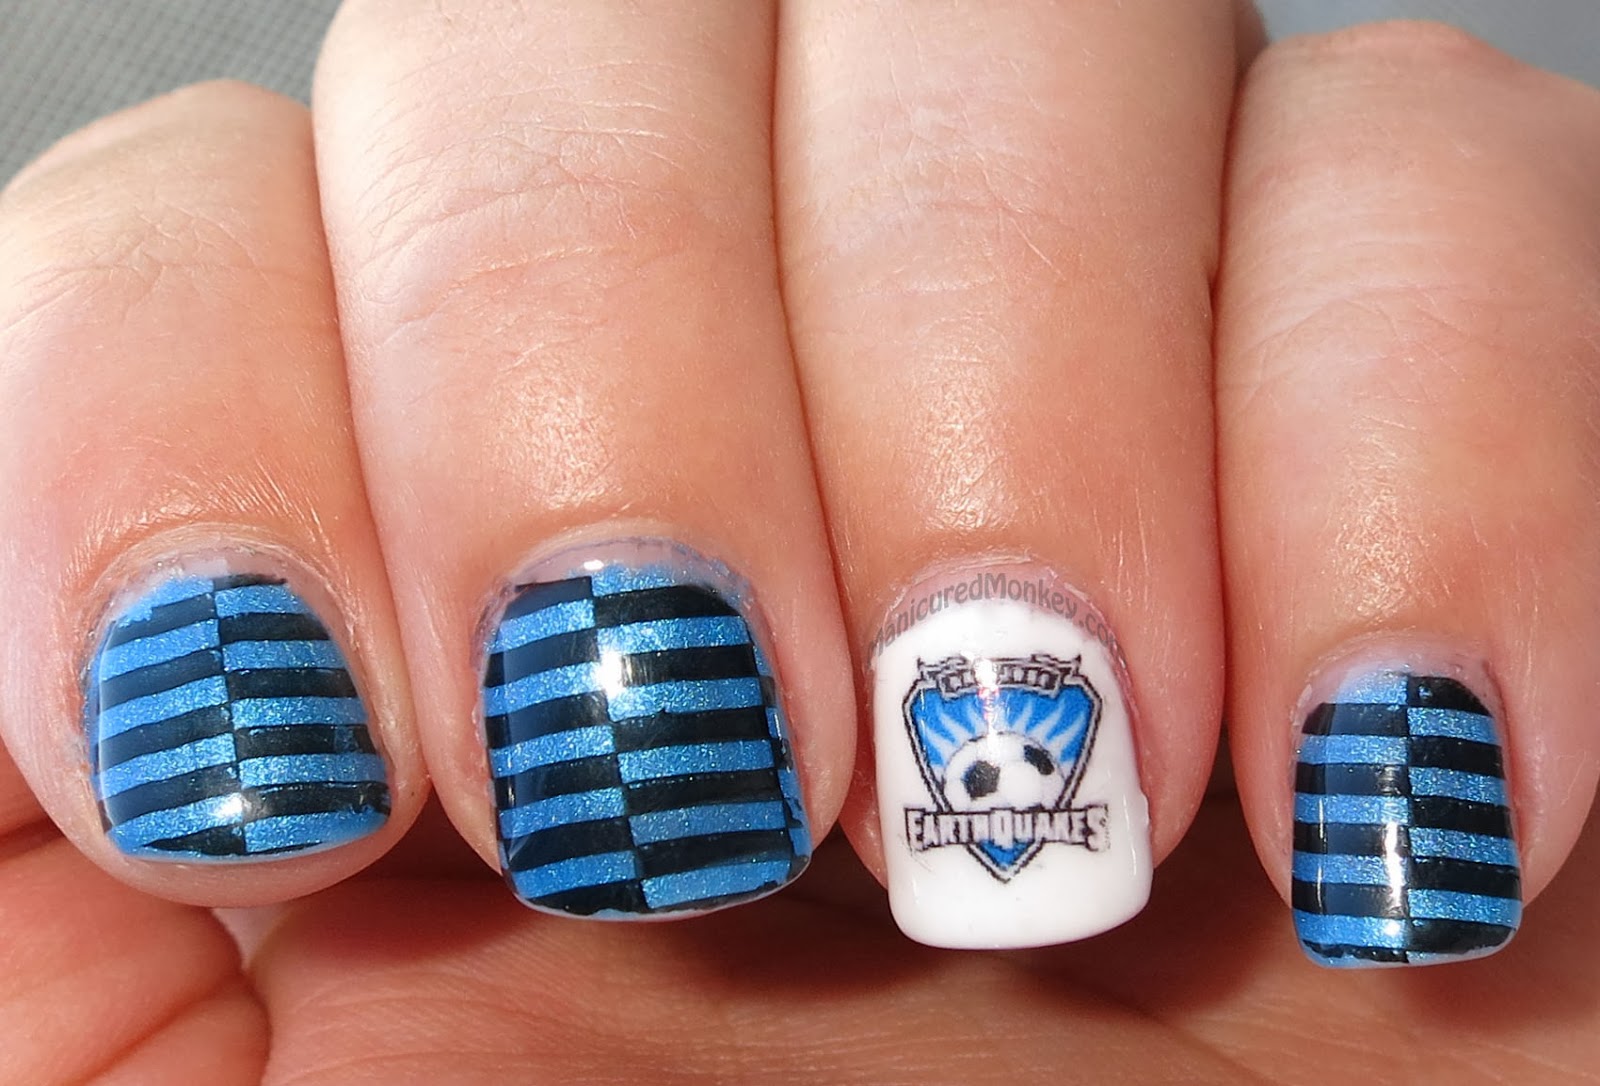
 Hi Monkeys, today I have a gel mani for you with a soccer flare to it. Recently the San Jose Earthuakes (MLS) unveiled their new shield\jerseys at a huge party and of course I attended (Go Quakes!). I wanted to theme my mani so I did some IBD gel magic. Sargasso Sea for the blue and Whipped Cream for the white; stamped using Milani Black Swift and made my water decal. I had to use the old shield because well... they hadn't unveiled the new one yet :)  I really loved this mani and it stayed on for about a week which is the usual for gel manis for me. The tip wear in this picture is about after 5 days of wear and tear. Overall a very cool mani that I'll repeat with the new shield!

Friday, September 14, 2012

Halloween Waterslide Decals

Hi Monkeys! I have finally put together the images for my Halloween waterslide decals that I'll be selling. Contact me at manicuredmonkey@gmail.com to place an order. (this is for U.S. orders only, international contact me, well figure out shipping costs.)
Love Halloween!!!

Tuesday, May 1, 2012

Guest Post: Watercolor! from Jen's Painted Tips!

This is a watercolor mani from Jen at Jen's Painted Tips. She has a great tutorial on this method, check it out, I have yet to get the courage to do this :)

From Jen:
Base of my absolute favorite "white" Sally Hansen Lavender Cloud then watercolored with Color Club Incognito, Sally Hansen Commander in Chic, China Glaze Fois Gras, and $OPI 212. Accented with a wonderful monkey decal! I love monkey decals.


Thank you Jen for the guest post! Check out her blog HERE for more of her creative manis!

Tuesday, March 20, 2012

Soccer Mani: Featuring my Water Decals

For those who do not know, I'm a HUGE soccer fan and support our Northern California team the San Jose Earthquakes. Each home game, I try to do a different Quakes themed mani, this past weekend I went with nail decals I made of their shield. I started with two easy coats of Healing from Dr.'s Remedy which is the perfect light gray creme. Then I took Jordana Blue Bash and sponged it onto the tips and sides of my nails. Then the hard part came, cutting out 10 decals and adding them on (the application process is a cinch, just soak in water 20 seconds then slide it off the paper onto your nail, the trimming took long). You can purchase my decals HERE and I do custom decals at no extra charge, they're 20 for $2.50 and I throw in random extras as well.  Overall, I LOVE this mani so much!

Friday, February 17, 2012

Essie: Navigate Her

I have Essie Navigate Her for you today from their Spring 2012 collection.  It is this awesome pistachio green creme that's opaque in two coats, no problem.  I slapped a top coat of SV over it then added a cute monkey water decal from  KKCenterHK and topped with another SV coat over the decal. The decals are like the ones I sell on Etsy so I had no problem using them. You cut out the image, soak in water for a few seconds and they slide right off. This image is so adorable! I really love it over Navigate Her, it's a quick and fun way to jazz up your mani.
KKCenterHK has over 600 water decals to choose from, you can browse them all HERE. Prices vary depending upon the design but generally range from $2-6.

*product sent for review*

Tuesday, January 31, 2012

Guest Post: The Kracked Kat and my nail decals!

The Kracked Kat had ordered some custom nail decals from me and this is what she came up with :)
Head over to her site to see the full mani and details.

My custom decals can be purchased HERE.

Monday, January 23, 2012

Water Decals: Hello Kitty Lady Bugs

I have a cool guest post for you today: Jen from Jen's Painted Tips used some water decals I madefor her (can buy them from my Etsy store).  Thanks to Jen for the guest post!!
From Jen: 
Among other things, the AWESOME Manicured Monkey sells water decals.

I have a thing for ladybugs. She made me some. She is all different kinds of neat.

:) I love these! They are just too cute!!!

I used Sally Hansen Complete Salon Lavender Cloud and the Monkeys stickers, topped with Seche Vite :) I wore this mani for 4 days with absolutely no chips, no tip wear, NOTHING.

Sunday, January 15, 2012

Manicured Monkey Mani and Make Up Brush Roll!

I have a coincidental mani for you today. I recently ordered a make up brush roll from Trinity Designs, (the same company that provided one for the giveaway) I put on two coats of OPI Do You Lilac It? and one coat of CND Lavender Pearl over it. I added my Manicured Monkey logo from a decal that I made (can buy my decals here). I didn't plan on matching colors and monkeys to my brush roll I received the day before, but I did and I love it! I wore the mani for only two days and it wore well. The CND doesn't show up that much on Do You Lilac It because the effect color is so similar to the base, but it looked pearly and pretty. I'll try it over a darker purple and I bet it looks like a whole different polish.

Don't forget to enter my giveaway, and you can tweet about it once a day to get an extra entry :) 

Saturday, December 17, 2011

China Glaze: Velvet Bow, BM 213 and a Reindeer

Alrighty! Another polish from China Glaze's holiday 2011 collection: Velvet Bow. It's a red creme that's rich in tone and was opaque in two coats (I've showed you this one before), but for my accent nail I did a white base and put a holiday reindeer decal over it. I purchased the decal off of ebay and was sad because they did not have sticky backs, so basically you soaked it in water to get it off the paper then it slid all over your nail. The ones I make don't do this, they have sticky backs after soaking so I'm not sure if this was different paper or just a bad batch... Anyways, then I took my Bundle Monster plates and stamped white sleds using Konad polish then topped it all off with a coat of Seche Vite and called it a day!

Saturday, December 10, 2011

Christmas Penguin Mani

I am so in love with this mani! I used Sinfulcolors white and Wet N Wild Black Creme. I stamped using my Mash plate set (LOVE the bow)! Over the black base I also did China Glaze Golden Enchantment which is like Fairy Dust but with gold sparkle.  I also started printing and selling water decals through my etsy shop. I chose the cute penguins with a Santa hat on for my accent finger. The mani reminded me of a tuxedo and so it seemed natural to put a penguin decal on :-) What do you think? I love it, it's festive but not with your normal holiday colors. Total win! 
To purchase my water decals, you can click HERE.

Monday, June 13, 2011

Tutorial: Full Nail Water Decals

Hey everyone!
My cousin and I did another tutorial and this time it's Viva la Nails full nail water decals. Check it out! and don't forget to subscribe to Manicured Monkey on YouTube!


The decals work really well once you get the hang of applying them. I'm still wearing this mani on day three and it's pretty nice not having tip wear or chippage. If you're familiar with doing nail tattoos, or water decals this is exactly the same concept, just in a full nail design. The only gripe I have is that I wish the set came with 12 strips rather than 10 in case you mess up, you'd have a back up or 2. You can get these at Viva la Nails website and they retail for around $6 (2.95 UK pounds). These were sent for review because I'm part of their blogger program. I like these quite alot once I got the hang of applying them. I would suggest a base coat that is similar to the design you are using.

The cool thing about the zebras is that if you have a wide nail bed and have black painted as a base coat, you don't notice when the design does not go to the edge of your nail :D After my nails dried, I took the edge of a gritty file and worked around my cuticles to remove any of the decal that was up too far. It worked like a charm!
 Don't forget to subscribe to the Manicured Monkey YouTube and check it out on the YouTube tab up top! And thanks to my cousin for being on summer break and taking over the YouTube part of Manicured Monkey! You guys will love what she has in store, she's so creative and talented!

also, have you entered my latest giveaway?!