This was a gel mani I did for someone and I love the way it turned out. It was simple using IBD Candy Blast over Jessica Windsor Castle. Windsor Castle is my favorite purple gel because it has berry undertones and applies like magic. The glitter topper is pretty delicious with green, blue, gold, purple, red mingling around. It is super dense which makes it even better for gel so you can get a thin coat in one swipe! Simple mani but it is very cute and was super sparkly in the sun.
Showing posts with label jessica. Show all posts
Wednesday, May 7, 2014
Jessica Windsor Castle with IBD Candy Blast- gel mani
This was a gel mani I did for someone and I love the way it turned out. It was simple using IBD Candy Blast over Jessica Windsor Castle. Windsor Castle is my favorite purple gel because it has berry undertones and applies like magic. The glitter topper is pretty delicious with green, blue, gold, purple, red mingling around. It is super dense which makes it even better for gel so you can get a thin coat in one swipe! Simple mani but it is very cute and was super sparkly in the sun. Sunday, May 4, 2014
French Tip Acrygel Nails
Recently I did acrygel nails with white tips for my cousin's prom. It was a bit of an experiment... We used white tip extensions but filed them down a ton so they were just peeking over the tip of her fingers but held a perfect smile line. I wasn't too happy with the tips I picked up, they were quite stuff and took some convincing to stay with glue. Basically I prepped the nail like I would for gels: buff, cleanse then glued the tips on, cut down the tips, buffed the tips, gel base coat\acrylic powder (3 coats) cured, buffed the nail (cleansed the accent, then stamped using a gold polish), one coat of gel top coat and cured it. It was quite the ordeal but I love the way they turned out. What do you think? Have you heard of acrgels? They also soak off much easier than regular gels!
Thursday, January 3, 2013
A Gel Mani with Stamping and Sparkle!
Recently I did a gel mani for my neighbor for her vacation over the holidays. I wanted to show you really quick that you can stamp over gel polishes; I'll also tell you how.
I used a Jessica base, top and polish, stamped with Sally Hansen Celeb City, used the Gals stamping plates (more on that in a different post but they're pretty awesome) and another gel that is like Fairy Dust for the sparkle... K, here we go:
On the ring and thumb fingers I stamped and the rest have the pseudo Fairy Dust gel polish over them. I like the way this mani turned out, I wish I had better pictures of it but it's super hard to take pictures of others' hands, especially at the kitchen table LOL Below I listed the steps for doing this manicure, let me know if you guys like seeing the steps or if you rather just see pictures.
I used the SensatioNail LED lamp for this manicure and the gel cure time was 30 seconds (half the time of UV), I seriously love love love the LED lamp for gel manis, not sure how I did without it before.
- lightly buff nail, cleanse with acetone
- put base coat on and cure for time specified on bottle (should be about 30 seconds)
- do two coats of color gel, cure inbetween- don't make coats too thick or they won't cure
- for stamping:
- take lint free wipe with alcohol and gently take off film of nails to be stamped (surface will look a little dull, that's ok)
- stamp as usual, clean up cuticles with eyeliner brush and acetone
- For Sparkles:
- paint thin coat of sparkle gel polish over nail and cure for time specified
- use gel top coat over all nails and cure
- put rubbing alcohol on a lint free wipe and go over each nail to clear the film
You are done now and have a great unique gel mani!
What do you think? It doesn't take long after you've stamped once or twice over gel. I use an XL squishy stamper so it rolls easily over my nail.
Thursday, October 4, 2012
Halloween Challenge: Black Cats (meow!)
For the second adventure in the Halloween Challenge the theme was black cats. Knowing how faboosh I am at freehand nail art, I opted to make decals. I have a bunch of different decals you can get through my etsy shop (I also do custom ones as well), so I printed out these cuties and slapped it over Jessica Birds of Paradise which is a blue tones purple that has a bit of tendency to show it's pink side. I used two coats for the base then added the cute kitties ferocious black cats on then went around the edges with Jessica Platinum Wishes which is an amazing multi color glitter that is jam packed with interest. I left my pinky with just a coat of the Platinum Wishes for funsies, I thought 3 black cats would be enough. I bet they'd look fantastic over a yellow or green neon though!
Some more info:
- The Halloween Challenge Pinterest board
- My Halloween Nail Art contest (voting is open!)
Check out everyone else's manis!
Some more info:
- The Halloween Challenge Pinterest board
- My Halloween Nail Art contest (voting is open!)
Check out everyone else's manis!
Wednesday, June 20, 2012
OPI: Your Web or Mine with Jessica Krystal Pink
I have a simple layering for you today. OPI Your Web Or Mine is a dusty pink frost that was perfect in two coats. I think I did a good job at getting the frosty lines pretty straight :) I did two coats of Jessica Krystal Pink which is an iridescent bar glitter with small silver glitter in a clear base. It's quite the festive top coat and the glitter lays flat which is a total bonus! It's a cute summer mani and if you don't like frosts but like the hue of Your Web Or Mine, Krystal Pink is a great top coat to add for a finished look.
Saturday, May 12, 2012
Gel Nails: My 1st attempt at tips
So recently I was given some supplies to try out gel nails with tips... let me show you pictures first then I'll tell you about the process I used and how to remove them. Keep in mind, this was my non dominant hand I applied the gel with and I've never used tips before, so be nice :)
The top picture is just the buffed nail and the cut down tips glued on. I have never glued on tips so I just went off of when I watched on You Tube. I also did this on my right hand with my left (non dominant) hand doing the applying in case I messed up, it wouldn't have been my swatch hand :) I used Jessica Build Gel you can purchase from NailEtc.com along with the tips. Basically I needed to scoot the tips towards my nail edge a bit more but instead, I just carried on with my experiment.
I did three layers of the build gel which is a clear gel meant for french manis. It's not the top coat gel, but literally a gel that is in a pot and you use a brush to apply (another reason I had a hard time getting it smooth because I'm used to a polish brush). It was a bit difficult to get it all even between the tip and the nail plate but I'm sure it'd be much easier on my left hand or on someone else. I topped it with the Jessica Geleration Finish top coat, wiped it off with alcohol so it was shiny then I foiled it to remove it.
I used the OPI Expert Touch foil wraps (didn't take an after picture but the tips and gel came right off with no harm to my nail beds). These are super easy to use and what I found works well is after you buff the top to break the seal then,wrap them (picture 3), apply heat to the foils: use a warm moist towel or a heating pad to put over your fingers to help the acetone peel back the gel and loosen the glue under the tip. You just twist as you pull the foil off, loosen any left overs with an orange stick (I use the rubberized kind for gel manis) and you're good to go for your next mani. Overall this was great and apparently while the tips won't last like if you got acrylic, they would last for a few days if you were going out for a dinner or event like prom or such. Great idea for the next time I want a simple french with tips. I plan on trying this out again but using my dominant hand and a better brush.
You can check out NailEtc for gel mani supplies, I purchased my light and starter kit through them.
*products provided for review*
The top picture is just the buffed nail and the cut down tips glued on. I have never glued on tips so I just went off of when I watched on You Tube. I also did this on my right hand with my left (non dominant) hand doing the applying in case I messed up, it wouldn't have been my swatch hand :) I used Jessica Build Gel you can purchase from NailEtc.com along with the tips. Basically I needed to scoot the tips towards my nail edge a bit more but instead, I just carried on with my experiment.
I did three layers of the build gel which is a clear gel meant for french manis. It's not the top coat gel, but literally a gel that is in a pot and you use a brush to apply (another reason I had a hard time getting it smooth because I'm used to a polish brush). It was a bit difficult to get it all even between the tip and the nail plate but I'm sure it'd be much easier on my left hand or on someone else. I topped it with the Jessica Geleration Finish top coat, wiped it off with alcohol so it was shiny then I foiled it to remove it.I used the OPI Expert Touch foil wraps (didn't take an after picture but the tips and gel came right off with no harm to my nail beds). These are super easy to use and what I found works well is after you buff the top to break the seal then,wrap them (picture 3), apply heat to the foils: use a warm moist towel or a heating pad to put over your fingers to help the acetone peel back the gel and loosen the glue under the tip. You just twist as you pull the foil off, loosen any left overs with an orange stick (I use the rubberized kind for gel manis) and you're good to go for your next mani. Overall this was great and apparently while the tips won't last like if you got acrylic, they would last for a few days if you were going out for a dinner or event like prom or such. Great idea for the next time I want a simple french with tips. I plan on trying this out again but using my dominant hand and a better brush.
You can check out NailEtc for gel mani supplies, I purchased my light and starter kit through them.
*products provided for review*
Wednesday, March 21, 2012
Jessica: Geleration Mani- Hot Fudge and Kaleidoscope
This is the second of my gel manis. This one was done by a friend who I was teaching gel manis to, so it's her first try and she did very well. She started with 3 (I think, or 2) coats of Jessica Geleration Hot Fudge which is a great medium brown that has holo shimmer (check out the blurred photo on the side!). She then put sparkles on my accent nails, Kaleidoscope which is an iridescent glitter in a clear base (she went a bit crazy on one side so it was bulging, do thin coats, even glitter). This mani was cute and I only wore it for a day because it started peeling (coats were too thick) but I'll re-visit this combo, it's such a pretty shimmery polish.
Thursday, March 15, 2012
Jessica Geleration: Winterberry (gel mani) +M63
I've been experimenting with gel manicures lately. I got a UV light and some Jessica Geleration polishes to try out. This was a manicure I wore for a recent funeral I went to (hence the no post yesterday, I was recovering from travel time). I only had it on 3 days because I needed to swatch more but it held up great. I did 3 thin coats of Jessica Winterberry then stamped with Milani Silver Stilettos in the Konad M63 plate. You can see that Silver Stilettos was stellar for stamping with and I love it over the dark purple merlot color or Winterberry. One of the awesome things I like about gel manicures is that they are super super shiny, I have never been able to get a regular polish clear coat as shiny, it's amazing and makes for a really clean look. This was my first time doing a gel mani on myself and I think I did a pretty darn clean job :) I'm sure there's more I'll be doing.
Monday, January 16, 2012
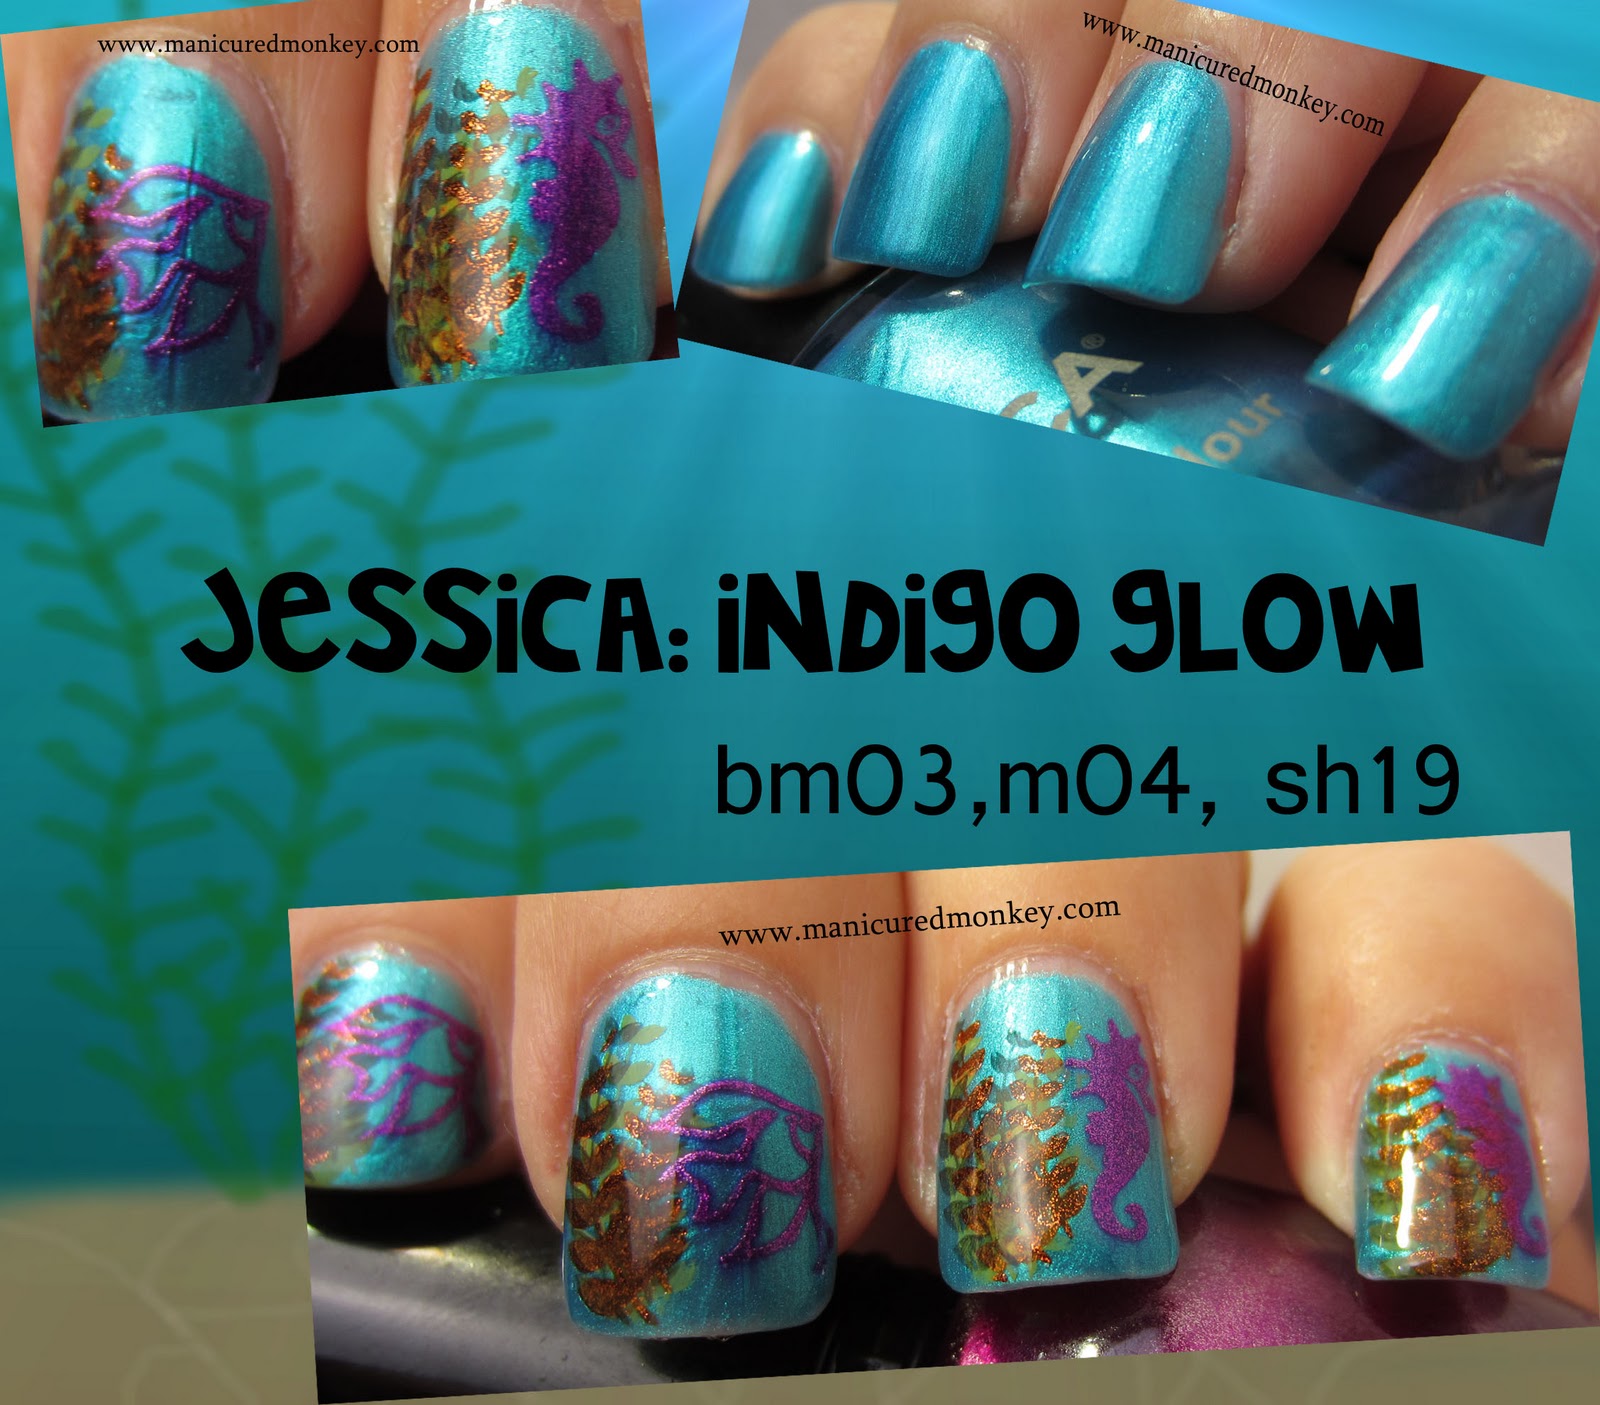
Jessica: Indigo Glow
This is my under the sea mani for the Facebook stamping group I recently joined. I used two base coats of Jessica Indigo Glow which is a bright aqua shimmer. The formula was great and the color on its own was very bright and cheery. I stamped the fish and seahorses using Kleancolors Metallic Fuschia. I did the seaweed look by layering three polishes:
Spoiled: Visually Slimming, Kleancolor Metallic Orange, Essence Lime up! all layered and slightly offset. It wasn't a bad mani, I just wish that the image I used as seaweed was only one piece instead of a cluster because it took up nail real estate :) It's my first Sunday challenge though so I'll let it slip by for now.
Subscribe to:
Posts (Atom)